글을 쓰게 된이유
학원에서 스프링을 배웠다 하지만 그 스프링도 맛보기로 배운 스킬 실무에서는 스프링부트를 사용하기에 나는 많이 다르다고 느꼈다. 그리고 편리한 기능도 많고 좋은기능도 많다는 것을 알게 되었지만 스프링부트에 대해서 더 많이 알고싶어 강의를 수강했다. 그 강의의 내용을 바탕으로 글을 쓸 예정이다.
Core Features
Spring Boot lets you externalize your configuration so that you can work with the same application code in different environments. You can use a variety of external configuration sources, include Java properties files, YAML files, environment variables, an
docs.spring.io
커스텀마이징을 제대로 사용하기위해서는....
나는 항상 아래와 같이 Application을 이렇게 실행했다. 하지만 아래처럼 실행하면 스프링부트에서 제공하는 많은 커스텀마이징을 적용하기 어렵다고한다.
변경 전
SpringApplication.run(Application.class, args);변경 후
SpringApplication app = new SpringApplication(Application.class);
app.run(args);
or
new SpringApplicationBuilder()
        .sources(Application.class)
        .run(args);
만약에 run을 해도 중지된다면 maven에 web dependensy가 있는지 확인해주는게좋습니다.
<dependency>
    <groupId>org.springframework.boot</groupId>
    <artifactId>spring-boot-starter-web</artifactId>
</dependency>
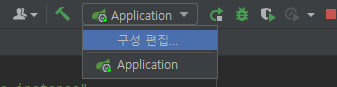
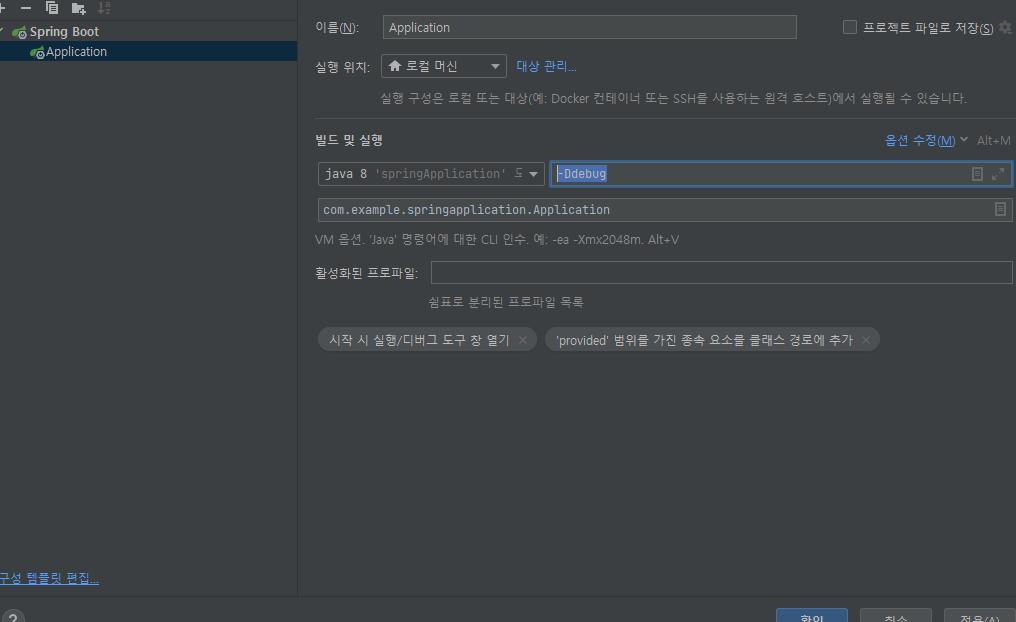
레벨조정하기
한글 : 구성편집 > Application > vm 옵션
영문 : Edit Configurations.... > Application > vm option
" -Ddebug " 를 입력해준다.
배너 (1.3. Customizing the Banner)
첫번째 방법 : resources > banner.txt 생성 *만약 위치를 변경하고싶다면 properties에서 아래처럼 정의할 수 있다.
spring.banner.location=classpath:위치/banner.text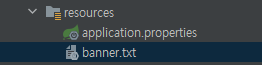
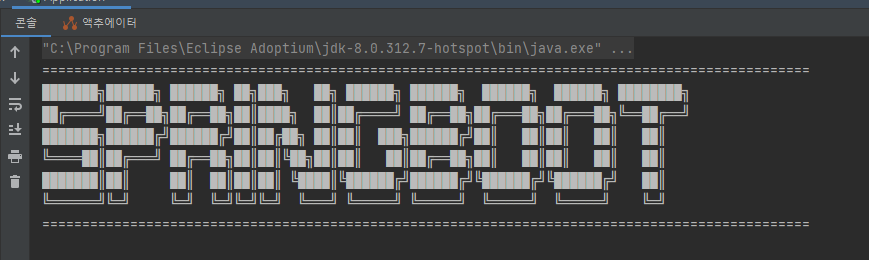
커스텀 배너를 만들고 실행하면 커스텀 배너가 나오는걸 확인할 수 있다.
================================================================================================
███████╗██████╗ ██████╗ ██╗███╗   ██╗ ██████╗ ██████╗  ██████╗  ██████╗ ████████╗
██╔════╝██╔══██╗██╔══██╗██║████╗  ██║██╔════╝ ██╔══██╗██╔═══██╗██╔═══██╗╚══██╔══╝
███████╗██████╔╝██████╔╝██║██╔██╗ ██║██║  ███╗██████╔╝██║   ██║██║   ██║   ██║
╚════██║██╔═══╝ ██╔══██╗██║██║╚██╗██║██║   ██║██╔══██╗██║   ██║██║   ██║   ██║
███████║██║     ██║  ██║██║██║ ╚████║╚██████╔╝██████╔╝╚██████╔╝╚██████╔╝   ██║
╚══════╝╚═╝     ╚═╝  ╚═╝╚═╝╚═╝  ╚═══╝ ╚═════╝ ╚═════╝  ╚═════╝  ╚═════╝    ╚═╝
================================================================================================
배너는 아래 링크에서 만들 수 있다.
Text to ASCII Art Generator (TAAG)
patorjk.com
두번째 방법 : main메소드에서 코딩을 할 수 있다.
    public static void main(String[] args) {
        SpringApplication app = new SpringApplication(Application.class);
        app.setBanner((environment, sourceClass, out) -> {
            out.println("================================");
            out.println("springboot");
            out.println("================================");
        });
        app.run(args);
    }
아래 문서 VariableDescription를 이용하면 스프링부트의 버전도 찍을 수 있다.
| ${application.version} | The version number of your application, as declared in MANIFEST.MF. For example, Implementation-Version: 1.0 is printed as 1.0. |
| ${application.formatted-version} | The version number of your application, as declared in MANIFEST.MF and formatted for display (surrounded with brackets and prefixed with v). For example (v1.0). |
| ${spring-boot.version} | The Spring Boot version that you are using. For example 2.6.7. |
| ${spring-boot.formatted-version} | The Spring Boot version that you are using, formatted for display (surrounded with brackets and prefixed with v). For example (v2.6.7). |
| ${Ansi.NAME} (or ${AnsiColor.NAME}, ${AnsiBackground.NAME}, ${AnsiStyle.NAME}) | Where NAME is the name of an ANSI escape code. See AnsiPropertySource for details. |
| ${application.title} | The title of your application, as declared in MANIFEST.MF. For example Implementation-Title: MyApp is printed as MyApp. |
================================================================================================
███████╗██████╗ ██████╗ ██╗███╗   ██╗ ██████╗ ██████╗  ██████╗  ██████╗ ████████╗
██╔════╝██╔══██╗██╔══██╗██║████╗  ██║██╔════╝ ██╔══██╗██╔═══██╗██╔═══██╗╚══██╔══╝
███████╗██████╔╝██████╔╝██║██╔██╗ ██║██║  ███╗██████╔╝██║   ██║██║   ██║   ██║
╚════██║██╔═══╝ ██╔══██╗██║██║╚██╗██║██║   ██║██╔══██╗██║   ██║██║   ██║   ██║
███████║██║     ██║  ██║██║██║ ╚████║╚██████╔╝██████╔╝╚██████╔╝╚██████╔╝   ██║
╚══════╝╚═╝     ╚═╝  ╚═╝╚═╝╚═╝  ╚═══╝ ╚═════╝ ╚═════╝  ╚═════╝  ╚═════╝    ╚═╝
================================================================================================
${spring-boot.version}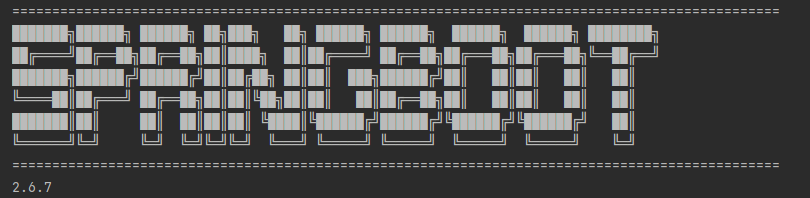
배너모드를 off하고 싶다면 app.setBannerMode() 를 이용한다.
public static void main(String[] args) {
    SpringApplication app = new SpringApplication(Application.class);
    app.setBannerMode(Banner.Mode.OFF);
    app.run(args);
}'무조건 따라하기 > 스프링부트(SpringBoot)' 카테고리의 다른 글
| [스프링 부트 개념과 활용] SpringApplication 2부 (0) | 2022.05.03 |
|---|